Source: http://www.popsci.com/diy/article/2007-08/ultimate-all-one-beer-brewing-machine
Much of the big processing tasks in biological research remain the domain of clusters of computer nodes, whether local or an Amazon EC2 instance, running various flavors of Linux. It is perhaps safe to say that this fact will remain true in at least the near future. There is a momentum behind this particular approach for multifarious reasons, resulting in versions of Linux catered to particular tasks (e.g., see https://www.scientificlinux.org/), and a package management system (usually distribution/version specific) that simplifies the process of installation and execution of thousands of programs. Yet Linux is not the dominant operating system on researchers’ personal computers.
Having a firm grasp the command line (CL), secure shell, or ssh, and associated protocols is very important, and will allow access to these larger computational resources. Yet, there remains the simpler CL computations that can be completed on one’s own desktop/laptop. Chances are, this machine is not running Linux, and so all the time saving automation that comes with Linux is lacking. Instead, one is confronted with the task of downloading source code, compiling (hoping there is a makefile or your compiler is just the right version; see http://software-carpentry.org/ for info for developing better standards for software development), etc.. Having a package manager, or an application that allows one to download and install software in an automated way, can be a huge time saver, and prevent any number of headaches that can often accompany software developed for research purposes.
As mentioned above, Linux distributions come with a wide range of great package managers, which can differ in comprehensiveness depending on the flavor you choose. But what about a Mac? Two of the most historically used managers for Mac were MacPorts and Fink. Instead of these managers I rely on the new kid on the block, Homebrew!
Homebrew is a Mac focused package manager, with a repository of installation scripts hosted by github (the same repository we’re using for our code snippets here at the Molecular Ecologist). I have found the Homebrew package manager extremely useful, and it’s getting better everyday through community wide development. Below I provide a brief description of the process of getting your Mac set up with Homebrew, including screenshots of my terminal. IMPORTANTLY, before deciding to use Homebrew instead of Macports or Fink (it’s possible to have them installed simultaneously, this set up is not recommended), make sure Homebrew has your favorite research tools available by checking out Braumeister.org, a website dedicated to tracking available packages.
So you’ve confirmed that Homebrew has the tools you want, how easy is it to get started? First, make sure you’ve installed either Xcode and associated Command Line Tools (in the newer versions this has to be done through the Preferences panel, or simply the Mac OSX Command Line Tools sans Xcode (saving you a couple GBs of space on your hard drive). Both of these packages can be accessed through the Apple Developer Center. If you’re doing a lot of CL work on your Mac, you probably already have these installed. With the Unix tools in place that comes with either Xcode and/or Command Line Tools, simply execute the following command on your terminal (though, again, read the guidelines first!):
ruby -e "$(curl -fsSL https://raw.github.com/mxcl/homebrew/go)"Below is the terminal of a Taylor lab iMac we’ve lovingly named GeorgePrice (we tend to name our machines after our favorite scientists of yesteryear), and so the full console prompt is:
GeorgePrice~$
Anything after this prompt encompasses the command you are requesting your machine to execute. You might see something quite different depending upon your machine’s name and CL set up.

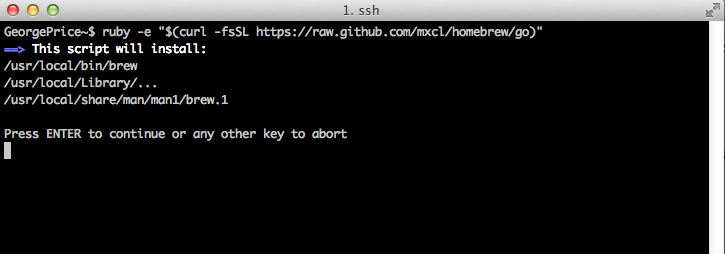
Once you’ve executed the script, you should see the following prompt asking you to confirm you want to continue installing Homebrew:

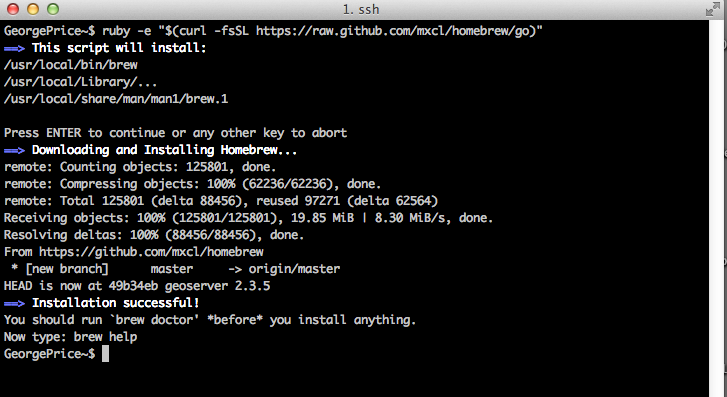
If you go forward with the install you should see something like the below image on your terminal. It will probably not be exactly the same, as the most current version will be installed and the screenshots are from an earlier version.

Assuming you see “Installation successful!”, your future interactions with Homebrew are modulated through the following basic command syntax: brew [OPTIONS]. brew is the Unix tool you’re using, and we’re going to cover a few [OPTIONS] below to get you going. You SHOULD run the following command in your terminal, “brew doctor“. Here, the ‘doctor’ option runs a tool that will assess your computer’s current settings and their relation to a fully functioning Homebrew installation. Some common problems brew doctor has found for me include not having the most recent version of Command Line Tools, conflicting versions of programs, odd files in the location where Homebrew is installed by default (/usr/local/Cellar). You should take these suggestions very seriously, as not doing so can lead to many downstream errors. However, you should make sure you know the origin and function of any of the files that seem to be in conflict with your Homebrew installation. Once conflicts are resolved, your brew doctor command should result in the following:

So what’s changed on your computer? With the simple command “brew search“, you can now observe all the different packages now available for installation through the command “brew install x“, where x is the package of interest.

The base Homebrew installation gives one access to a wide range of common CL tools. However, Homebrew has a number of “taps” that focus on particular types of tools. I would recommend one particular tap, which can accessed via the following commands executed in the terminal:
brew tap homebrew/science

You can check out the Homebrew-science github page to get a full list of the available packages.
A fresh installation of Homebrew will not include any managed packages. You can verify this by executing brew list:

Is there a particular tool you’re looking for?
brew search y, where y is the desired program.
If it’s not there, log into github and access the homebrew-science page and put in a request.
One of my favorite CL tools is Analysis, which is a simple CL tool for evolutionary genetic analysis written by Kevin Thornton (in particular I’ve found great utility in the “compute” program, described on the Analysis page as a “mini-DNAsp” for the Unix command-line). Thanks to @vsbuffalo for adding this package to Homebrew-science!
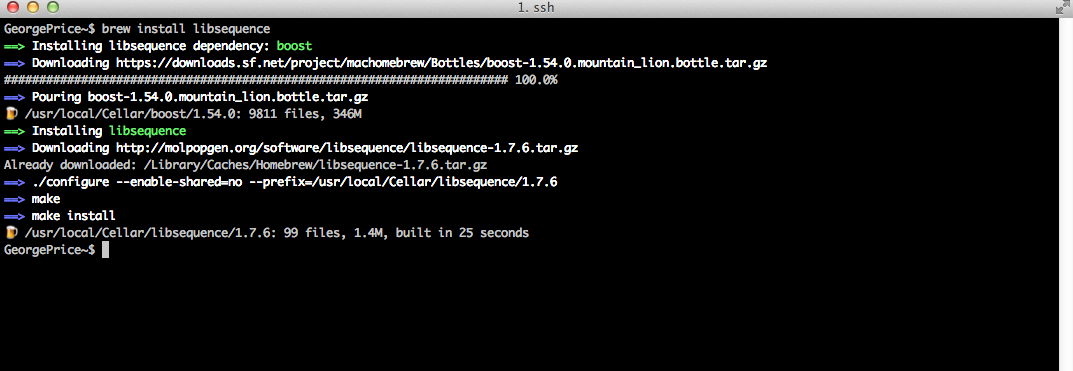
We’ll start by installing libsequence, a C++ software library that Analysis depends upon (actually, we could have skipped this part, as Homebrew will detect dependencies as part of the installation process and install them simultaneously).

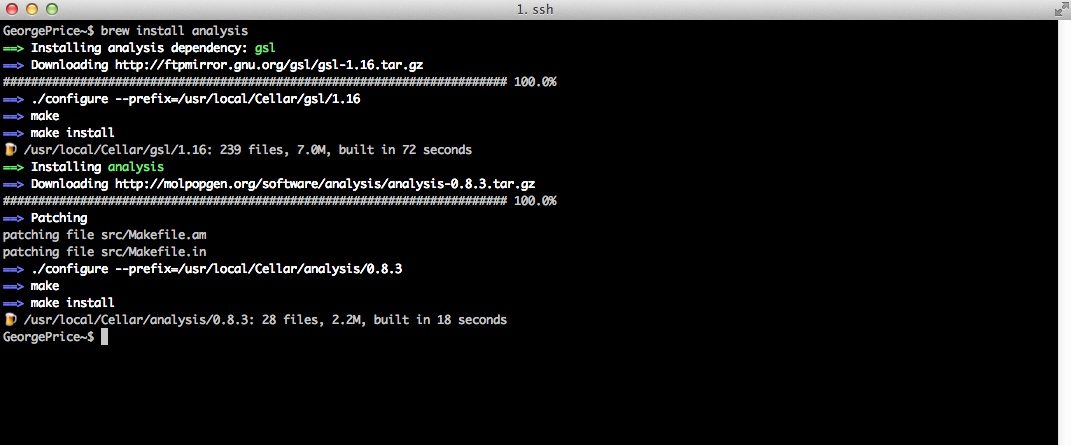
With libsequence in place, we can now install Analysis:

With Analysis installed in this manner, the associated tools are directly accessible from the CL, without having to include the full path (/usr/local/Cellar/…) to the tool. And notice we didn’t have to tinker around with sudo!
You’ll want to keep up with the newest versions of your programs and Homebrew itself. All you need is:
brew update

to see what modifications of the softwares maintained by Homebrew (and additional taps) have been made. Ready to upgrade? Just:
brew upgrade

In the present case, I’ve made a clean install and quickly executed the upgrade command. As such, there weren’t any modifications to the installed packages.
In the end, Homebrew is by no means a panacea to your cross-platform software needs. You’re sure to notice that, while there are tons of packages available, some of the ones that are so basic to most molecular ecology workflows are not presently managed by Homebrew:

We’ll be writing more about getting your favorite analytical CL packages into Homebrew in coming posts. Give it a try and let us know if you have any suggestions for making Homebrew even better!
