Skip to content
The Molecular Ecologist
Home
How to …
Book reviews
NGS Field Guide
Podcast
About
Write for TME
Support TME
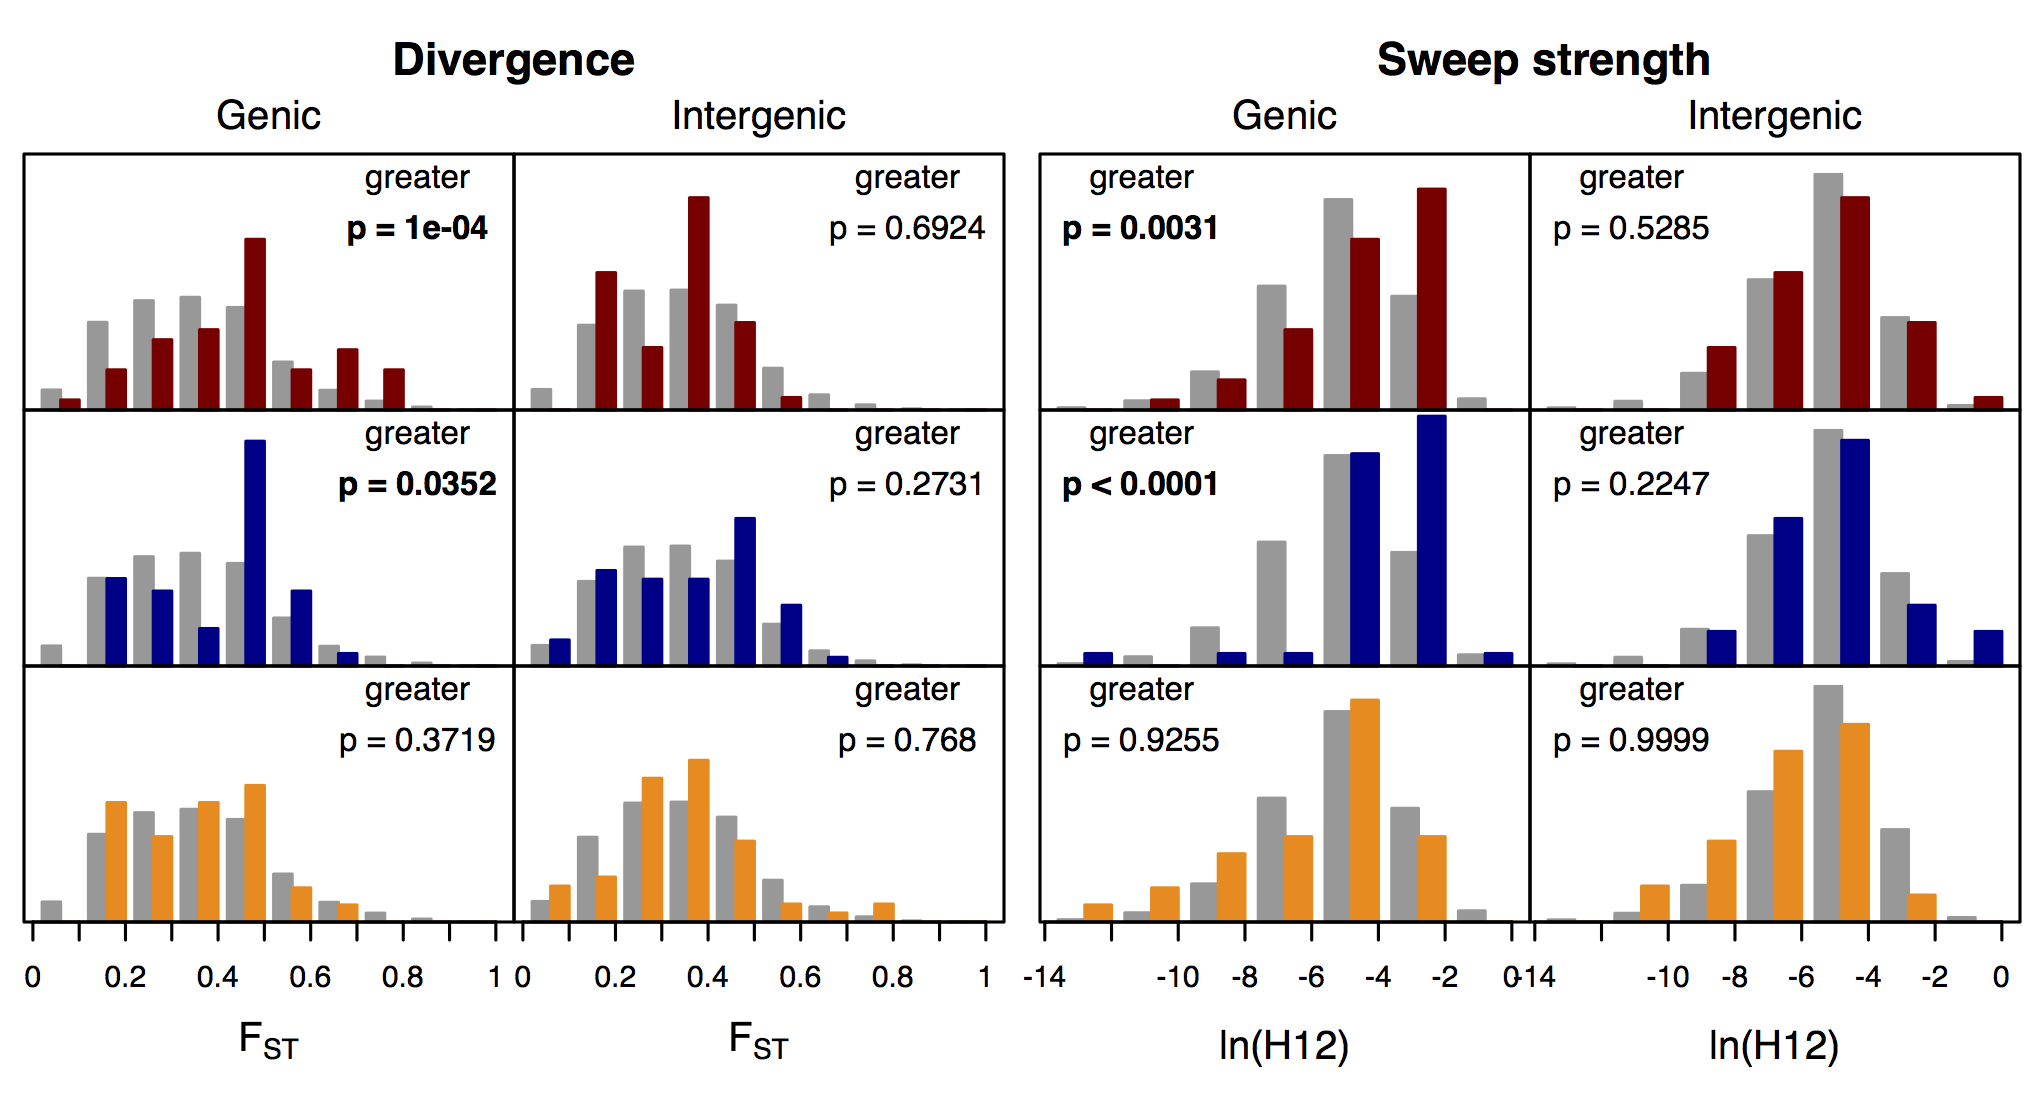
Figure 3 – flanking region stats
By
Jeremy Yoder
|
Published
22 Apr, 2014
|
Full size is
2042 × 1098
pixels
figure3
Supp Figure 9 - growth chamber experiment
bar
Bookmark the
permalink
.

